
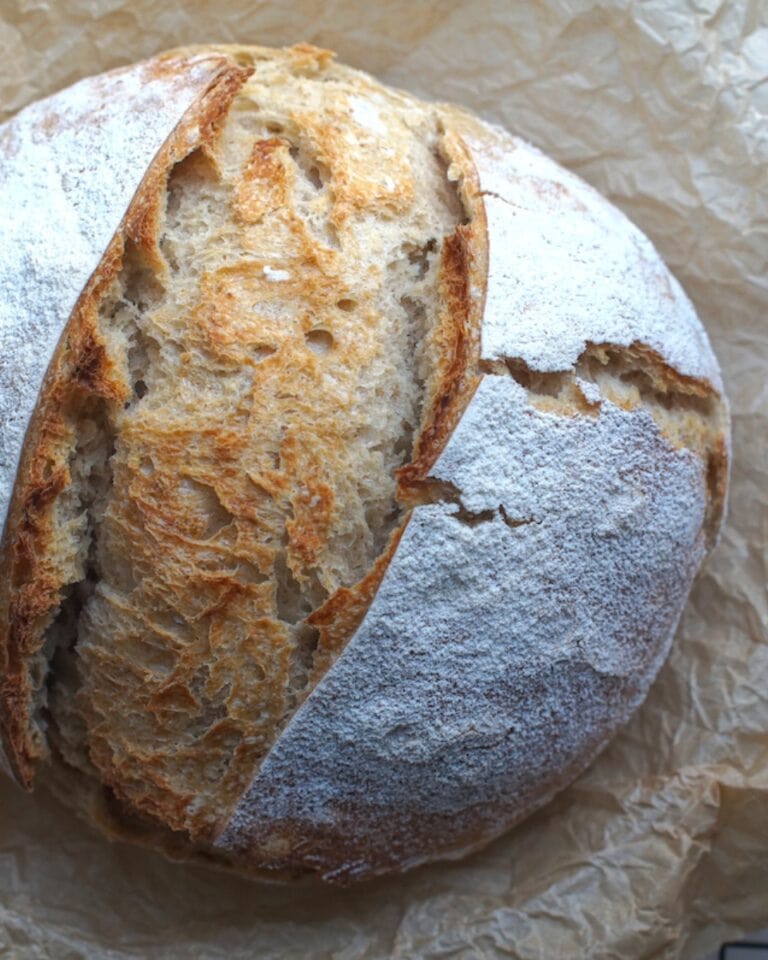
Spelt Sourdough Bread
This beginner spelt sourdough bread has a crisp, shattering crust and tender crumb. A simple bread scald keeps it moist and delicious.
This post may contain affiliate links. As an Amazon Associate, I may earn a small commission from qualifying purchases at no extra cost to you.


If you’ve been around here for a while, you know my heart belongs to bread baked with fresh-milled flour. But every now and then, a simple white loaf absolutely has its place.
This beginner-friendly white spelt sourdough is soft, tender, and easy to love, with none of the dryness spelt is famous for. I recently shared a guide on the Traditional German Stale Bread Scald, and this loaf is a perfect example of where that technique really shines: plain breads where texture matters just as much as flavor. The scald keeps the crumb moist and tender, while the crust bakes up thin, crisp, and shatteringly good.
If you’re new to spelt sourdough, this is an excellent place to start. It’s easy to handle, versatile, and well suited to everyday baking, whether you’re serving it with soup, turning it into sandwiches, or slathering it with butter and jam.
It’s the kind of loaf that disappears quickly. The one you keep slicing “just a little more” of before dinner, without thinking twice.
Why You’ll Love This Spelt Sourdough Bread Recipe
Spelt is an ancient grain with a naturally sweet, nutty flavor and a lighter gluten that many people find easier to digest. It needs to be handled a little differently than wheat, but with the right technique, it yields a flavorful, crusty loaf with a tender crumb.
A stale bread scald in the formula helps prevent the most common issue with lean spelt sourdough: a crumb that dries out too quickly. It also adds subtle depth of flavor and helps the bread stay fresher for longer. By allowing the dough to stay at a lower hydration, the scald avoids having to add more water and deal with a high-hydration dough.
The result is a versatile, beginner-friendly loaf that’s perfect for everyday eating. Delicious on its own or as a sandwich, it’s also a great side to soups and other simple meals.


Why Spelt Needs Different Handling
Spelt is an ancient grain and a direct ancestor of our modern wheat. While it has more protein overall, it forms a weaker gluten. The result is a dough that handles a little differently from modern wheat.
Its gluten is more extensible but less elastic: it can stretch, but it struggles to hold its shape. As a result, spelt loaves are usually smaller because the dough can’t trap gas as effectively.
Spelt dough also needs lower hydration (60-62% in this recipe). Adding too much water will make the dough collapse. Always add water slowly (5 grams at a time) and feel your way to a well-hydrated, manageable dough.
Visual clues are more reliable than volume. Don’t wait for the dough to fully double. Look for a lot of small gas bubbles just under the surface. Combined with a dough that’s nearly doubled, this is your best indicator that bulk fermentation is complete.
Finally, because spelt loaves tend to dry out faster, adding a scald or water-roux helps retain moisture. This keeps the dough manageable while producing a soft, tender crumb.
Tools You May Need
Danish Dough Whisk My favorite mixing tool when baking by hand.
Medium Bowl If you can, choose a bowl that is just big enough. It makes it so much easier to gauge rise.
Banneton Basket Or use a medium bowl lined with a clean tea towel.
Dutch (Bread) Oven (Optional) Cast iron pots are the most efficient way to create steam and a stable temperature for baking bread at home, especially in older ovens.
Bread Lame, Razor Blade, or another super sharp blade


Baking Timelines
|
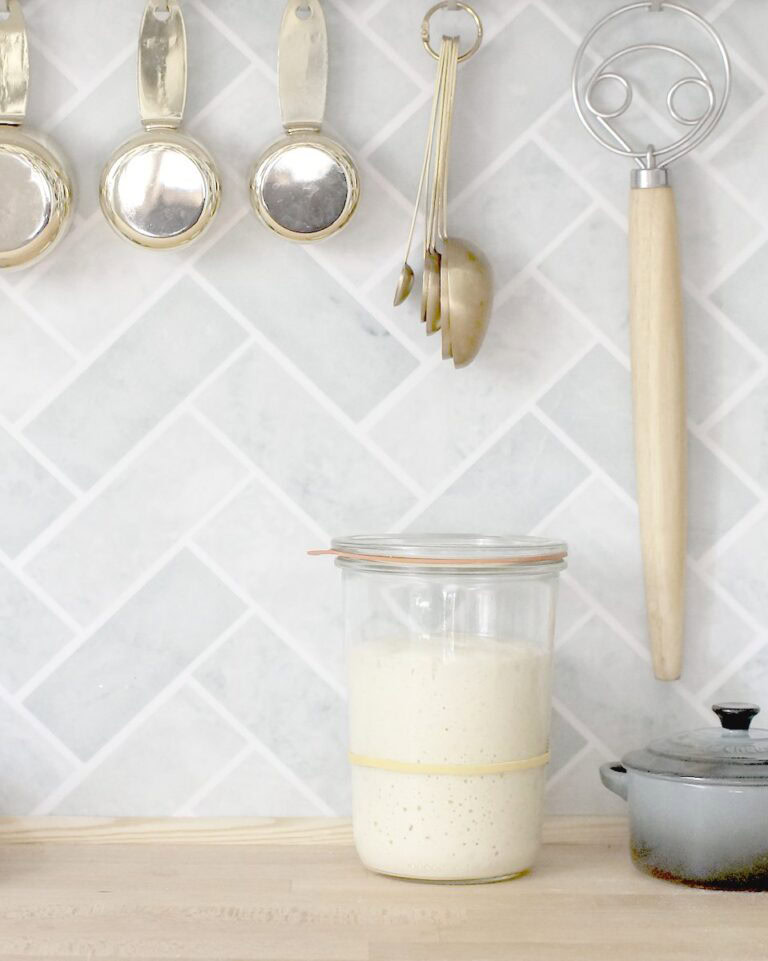
Feed your starter the night before so it’s active and bubbly in the morning. Prepare the stale bread scald and leave to cool while the starter rises. |
|
|
08:00 AM |
Mix all ingredients into a shaggy dough. |
|
08:30 aM |
Perform 3-4 round of stretch and folds, spaced 20-30 minutes apart. |
|
10:00 aM |
Bulk ferment until roughly doubled and bubbly beneath the surface. |
|
05:30 PM |
Shape the dough and proof in a banneton basket at room temperature for 30–60 minutes. |
|
06:30 PM |
Preheat oven and dutch oven. (Optional: rest the banneton in the fridge.) |
|
07:00 PM |
Score your bread and transfer it to the hot dutch oven. Close the lid and bake. |
|
07:20 pm |
Take off the lid and keep baking. |
|
07:40 pm |
Remove the baked bread from the dutch oven and let cool. |
|
Feed your starter in the afternoon so it’s active and bubbly in at night. Prepare the stale bread scald and leave to cool while the starter rises. |
|
|
09:00 pm |
Mix all ingredients into a shaggy dough. |
|
09:30 pm |
Perform 3-4 round of stretch and folds, spaced 20-30 minutes apart. |
|
11:00 pm |
Bulk ferment until roughly doubled and bubbly beneath the surface. |
|
06:30 am |
Shape the dough and proof in a banneton basket at room temperature for 30–60 minutes. |
|
08:00 aM |
Preheat oven and dutch oven. (Optional: rest the banneton in the fridge.) |
|
08:30 aM |
Score your bread and transfer it to the hot dutch oven. Close the lid and bake. |
|
08:50 am |
Take off the lid and keep baking. |
|
09:10 am |
Remove the baked bread from the dutch oven and let cool. |
Ingredients & Substitutions
Stale Bread
Replacing a small portion of the flour with roasted, dried bread and scalding it with boiling water not only locks in moisture, it also carries a subtle roasted bread flavor over into your next loaf. If you’ve never used one before, I’ve put together a guide on Adding a Stale Bread Scald to Any Bread Dough, which shows you how to choose and prep leftover bread and calculate and prepare the scald itself.
White Spelt Flour
Choose a high-quality all-purpose or plain spelt flour, the kind you’d normally use for cakes. If you’d like to blend in whole spelt or some fresh-milled flour, increase hydration slightly.
Sourdough Starter (100% Hydration)
Use active, bubbly starter that’s been fed within the last 4-6 hours. If you keep your starter in the fridge, make sure it’s been fed within the last 7 days.
How to Make Spelt Sourdough Bread (Step-by-Step)
Step 01
Prepare the Scald

Weigh your stale bread crumbs or chunks into a small bowl or mixing container. Pour over boiling water, making sure all pieces are submerged. Cover and let cool to room temperature.
Depending on the coarseness of your bread, you can either leave the scalded crumbs as-is or blend larger pieces of bread into a thick paste with an immersion blender.
Step 02
Pre-Mix

In a mixing bowl, combine the water, salt, 100g of the stale bread scald, and sourdough starter. Swirl or whisk until mostly combined.
Add the spelt flour and, using either your hands or a Danish dough whisk, bring everything together into a shaggy dough. Cover and rest for 30 minutes.
Step 03
Stretch & Folds

Wet your hands. Grab one side of the dough, stretch it gently, and fold it over itself. Rotate the bowl a quarter turn and repeat at least three more times, until you feel tension building in the dough.
Let the dough rest 20–30 minutes, then repeat for 3–6 total sets, resting between each round.
Step 04
Bulk Fermentation

Once the final fold is done, cover the bowl and let the dough bulk ferment until it’s almost doubled and dotted with tiny bubbles underneath (usually 6-8 hours at room temperature, but check your dough rather than the clock).
You can find step-by-step images of the shaping process in my Whole Grain Soft Wheat Sourdough Bread recipe.
Step 05
Shape & Proof

Lightly flour a banneton basket, and lightly flour your counter and the top of the dough.
Wet your hands and gently release the dough from the sides of the bowl. Turn it out, smooth side down, and shape into a rectangle. Fold the top third down, the bottom third up, then fold the sides towards the middle. Flip seam side down, cup your hands around the dough, and gently pull it toward you to build surface tension. Place it seam side up in your prepared banneton.
Cover with a clean plastic bag or shower cap. Let it rest at room temperature for 30–90 minutes (or in the fridge for up to 12 hours).
Step 06
Score & Bake

Preheat your oven to 250°C (480–500°F) with a Dutch oven inside for at least 30 minutes.
Turn the dough out onto parchment paper and score it down the middle with a sharp blade. Carefully place the dough into the hot Dutch oven.
Bake covered for 20 minutes at 210°C (410–420°F), then uncover and bake another 20 minutes until golden and crisp. The loaf should sound hollow when tapped on the bottom.
Cool on a wire rack for at least 1 hour before slicing.


Tips & Troubleshooting
Variations
How to Serve Spelt Sourdough Bread


If you’re one of those people that needs a white loaf to enjoy sweet toppings (zero judgement), this one’s for you. It has well-rounded flavor, leans both sweet and savory, and eats alarmingly easy.
With a shattering crust and tender crumb, it tastes a lot like French bread and is just as versatile.
Dunk it into soup, turn it into a gourmet grilled cheese, or top with jam, cheese, deli cuts, or whatever else your heart desires. (Though if you ask me, this loaf is secretly destined for butter, Nutella, and a sprinkling of flaky sea salt.)
How to Store & Freeze
Spelt sourdough bread keeps its crust crisp at room temperature. Once the loaf is cut, wrap it airtight (either in a plastic freezer bag or another airtight container) to prevent it from drying out. For best texture and flavor, enjoy within 3-4 days.
Once wrapped, the crust will soften. To bring the crispiness back, simply toast or brown individual slices.
To freeze, you can store the loaf whole or sliced for up to 2–3 months. Wrap tightly in a plastic freezer bag, pressing out as much air as possible. If freezing slices, separate them with parchment paper. Thaw the loaf at room temperature overnight, or toast slices straight from frozen.
Recipe FAQs
If you make this Spelt Sourdough Bread…
I’d love to hear how it turned out!

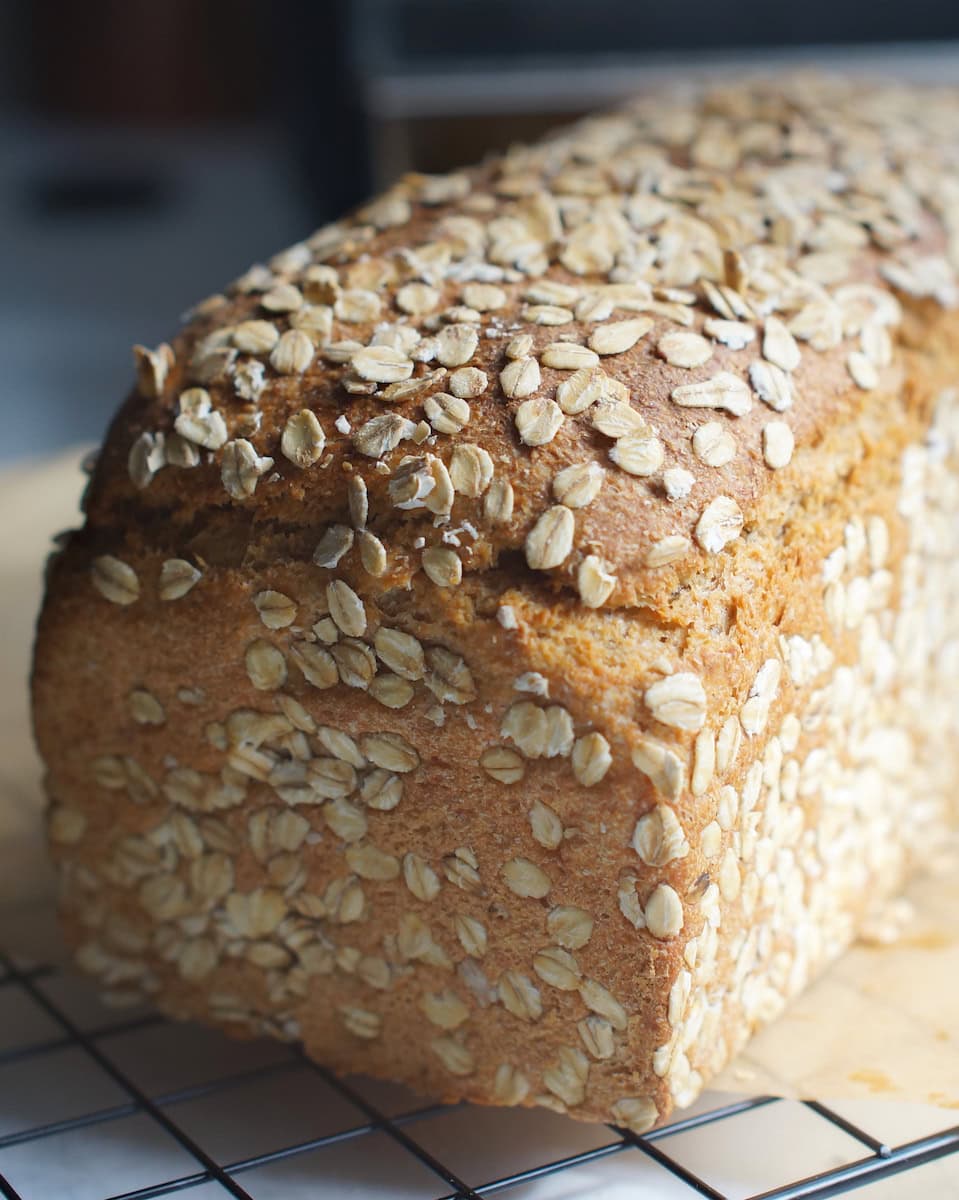
P.S. If you want to keep baking with spelt, you might love these recipes too:
happy baking!
Spelt Sourdough Bread
Equipment
- immersion blender - (optional, for an extra smooth bread scald)
Ingredients
Scald Ingredients
- 30 g stale bread - plain or roasted
- 90 g boiling water
Dough Ingredients
- 100 g stale bread scald
- 215-225 g water
- 10 g salt
- 100 g sourdough starter - active and bubbly
- 475 g white spelt flour
Instructions
Prepare the Scald
- Combine stale bread crumbs/chunks with boiling water in a small bowl. Cover and let cool. Blend larger pieces into a thick paste if needed.
Pre-Mix
- In a bowl, mix water, salt, 100g scald, and sourdough starter. Add Spelt flour and combine into a shaggy dough. Cover and rest 30 minutes.
Stretch & Folds
- Wet hands and fold dough over itself, rotating ¼ turn each time. Repeat 3-6 sets, resting 20-30 minutes between sets. Bulk ferment 6-8 hours at room temperature after the final fold (check your dough, not the clock).
Shape & Proof
- Flour a banneton or towel-lined bowl. Shape dough into a rectangle. Fold in top and bottom thirds, then both sides in, and flip seam side down. Pull it towards you to build surface tension and place in banneton, seam side up.
- Cover and proof at room temperature for 30-90 minutes (or in the fridge for up to 12 hours).
Score & Bake
- Preheat oven to 250°C (480-500°F) with Dutch oven inside for 30 minutes. Invert the dough onto a piece of baking paper, score, and place in the preheated Dutch oven. Drop temperature to 210°C (410-420°F) and bake covered 20 minutes. Remove the lid and bake uncovered for another 20 minutes, until golden.
- Cool at least 1 hour before slicing.
Notes
- Bread scald: New to scalds? See my Stale Bread Scald Guide for the whole process.
- Need visuals? Step-by-step shaping images are in my Whole Grain Soft Wheat Sourdough Bread recipe.
- Tight dough? Wait until the first stretch & fold, then add 5g water at a time if needed.
- Stretch test: Dough should stretch easily but not be wet. Add a little water if it resists.
- Big bubbles? Gently poke them with your fingers or the tip of a scraper before shaping.
- Timing tip: Watch the dough, not the clock. Starter strength and temperature change fermentation speed.
- Extra crisp crust: Open the oven door for the last 5 minutes to release steam if needed.
- Switch it up: Add seeds, swap in whole-grain flour, or try a different scald. See the Variations section for full instructions.


Ohh this looks so liveky and a great tutorial- thank you for sharing!
Love spelt, can’t wait to try this recipe out!
Thank you for such a thorough guide and great recipe. I love the bread scald for making it more moist. Very helpful! And I love a generous layer of butter with the nutella on white sourdough bread! 😍